
We all love long lasting, chip-free manicures and gel nail polish is an easy way to achieve them in the comfort of our own home, but while the application process is nice and smooth, the removal part is a completely different story. Luckily, the nail industry is ever evolving and there is now a product on the market specifically designed to make gel polish removal a breeze. Keep reading to learn what are the exact steps you need to follow in order to remove gel polish in under 5 minutes. You read it right, in under 5 minutes!
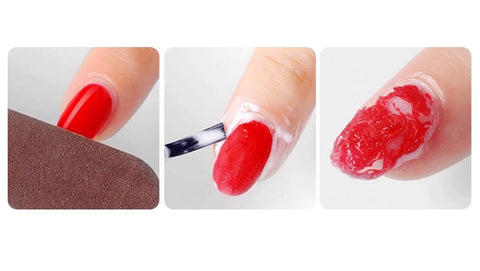
1. With a nail buffer or an electric nail drill, file off the top coat.


2. Start with one hand first and apply two layers of Magic Remover on each nail. Try to avoid applying the gel remover on your skin as it contains certain ingredients that would cause it to dry. The gel doesn’t spread easily due to its thick, guey texture, but if you’d like to be 100% sure it doesn’t get on your skin, as an optional step, you could apply Vaseline around your nails prior to applying the remover, just as you do in the case of acetone soaking to avoid dryness. Over-flow glue works as well.

3. Wait 2-5 minutes. You will notice how the nail layers will miraculously start lifting and bursting.
4. With a cuticle pusher, gently remove the gel polish.
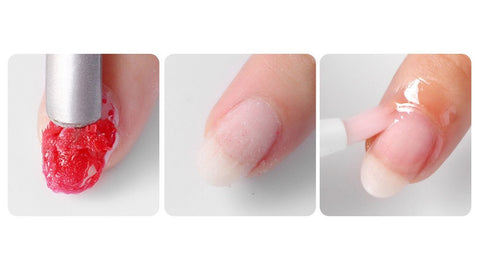
5. Apply cuticle oil to restore moisture and let your nails breath for a few hours.

Repeat same steps for the other hand. And voila!